Check out other posts of this Series:
Now that we have a server onto which we can build upon, it is time to get our hands dirty and cover a real exam topic for the first time in this series.
It is, perhaps the easiest one but it is important to be fast and mechanic about it to avoid spending time we do not have during the test.
If we stick with the Oracle Documentation on Installing Grid Infrastructure,
Ah! Since we are talking about the documentation, Alex Zaballa pointed out that something is wrong with the HTML downloadable version of the Oracle Documentation - The FULL documentation in compressed format that you can download from here.
Once you download and unzip the documentation, it does not work as the web version. Some features like the expand and collapse either do not exist of don't work depending on the browser you are using.
I have tested it and can confirm it isn't working as expected.
For the sake of these posts, we will be making references to the on-line documentation when it comes to where to finding things in it.
The Almighty Oracle Validated RPM
Yes, you could spend a lot of time being very thorough and going through this, or, you could save a lot of time and use the Oracle Validated RPM.
As for the Validated RPM installation, according to the documentation, I have the following options:
My Virtual Machine is not configured to have access to the internet. I cannot use this one.
Again, I cannot use the Public Yum Repository since my Virtual Machine does not have access to the outside world. However, I can configure Yum to use the Oracle Linux DVD image as a repository!
Installing the Oracle Preinstallation RPM From DVDs or Images
This is the one I like the most! In fact, I will be using a combination of both the Yum option and the DVD Image option.
So, let's mount our Oracle Linux DVD ISO file as a repository for Yum:
You can find the documentation on how to do this here and here.
I will quickly show you how I am doing this.
Configure the yum repository
Virtually insert and mount the DVD ISO on the Virtual Machine:

Click on Devices>Optical Drives and then select the ISO file. In our case the file name is V41362-01.iso.
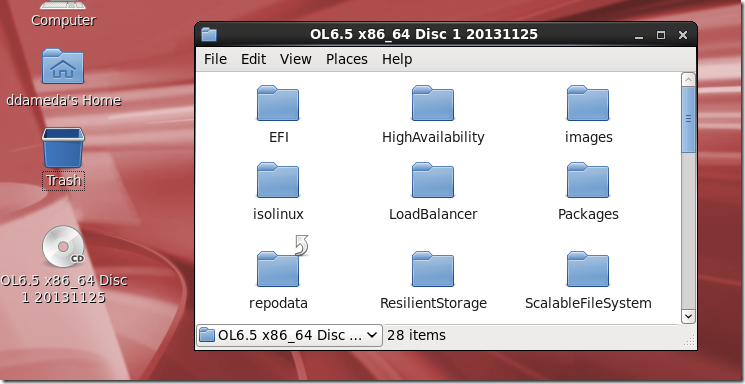
The file explorer window may popup showing that the ISO has been mounted and is ready to use:
 Open a Terminal Window and switch to the root user:
|
$ su - root
Password:
# df -h
Filesystem Size Used Avail Use% Mounted on
/dev/mapper/vg_ocmdb12cr1-lv_root 18G 4.4G 12G 27% /
tmpfs 2.0G 508K 2.0G 1% /dev/shm
/dev/sda1 477M 178M 271M 40% /boot
/dev/sr0 3.7G 3.7G 0 100% /media/OL6.5 x86_64 Disc 1 20131125
|
We must now change the yum configuration files and point it to the above mount point.
Disable all entries in the /etc/yum.repos.d/public-yum-ol6.repo file. (enabled=0)
Create a new file, in this case, /etc/yum.repos.d/OL65.repo with the following entries:
| # cat OL65.repo [OL65]
name=Oracle Linux 6.5 x86_64
baseurl=file:///var/OL6.5\ x86_64\ Disc\ 1\ 20131125/Server
gpgkey=file:///etc/pki/rpm-gpg/RPM-GPG-KEY
gpgcheck=0
enabled=1
# yum clean all Loaded plugins: refresh-packagekit, security Cleaning repos: OL65 public_ol6_UEKR3_latest Cleaning up Everything
# yum repolist Loaded plugins: refresh-packagekit, security ... repo id repo name status OL65 Oracle Linux 6.5 x86_64 3,669 repolist: 3,669 |
Once you have you configured like so, you can use it to install any missing packages you may have on your system. Refer to this procedure if you find yourself with missing software when attempting to install the Oracle VirtualBox Guest Additions.
In this case, we will be installing the Oracle Validated RPM as follows:
As you can see from the above output, The Oracle Linux 6.5 ships with the oracle-rdbms 11gR2 preinstall rpm. To simplify things, I will be making use of the 11gR2 preinstall rpm for this installation. However, the correct preinstall rpm for the Oracle 12c database are accessible through the Oracle Unbreakable Linux Network. Alternatively, if your VM’s network adapter has been configured as Host-only, you won’t be able to access the outside world from within your VM. In such cases, you can download the rpm from the the Oracle Linux Yum Server website, stage it on disk and install it with the Linux rpm command.
| # yum search oracle-rdbms oracle-rdbms-server-11gR2-preinstall.x86_64 : Sets the system for Oracle single instance and Real Application Cluster install for Oracle Linux 6 # yum install oracle-rdbms-server-11gR2-preinstall.x86_64 Loaded plugins: refresh-packagekit, security Setting up Install Process Resolving Dependencies --> Running transaction check ---> Package oracle-rdbms-server-11gR2-preinstall.x86_64 0:1.0-7.el6 will be installed --> Processing Dependency: compat-libstdc++-33 for package: oracle-rdbms-server-11gR2-preinstall-1.0-7.el6.x86_64 --> Processing Dependency: libaio-devel for package: oracle-rdbms-server-11gR2-preinstall-1.0-7.el6.x86_64 --> Processing Dependency: compat-libcap1 for package: oracle-rdbms-server-11gR2-preinstall-1.0-7.el6.x86_64 --> Processing Dependency: ksh for package: oracle-rdbms-server-11gR2-preinstall-1.0-7.el6.x86_64 --> Running transaction check ---> Package compat-libcap1.x86_64 0:1.10-1 will be installed ---> Package compat-libstdc++-33.x86_64 0:3.2.3-69.el6 will be installed ---> Package ksh.x86_64 0:20120801-10.el6 will be installed ---> Package libaio-devel.x86_64 0:0.3.107-10.el6 will be installed --> Finished Dependency Resolution ... ... Installed: oracle-rdbms-server-11gR2-preinstall.x86_64 0:1.0-7.el6 Dependency Installed: compat-libcap1.x86_64 0:1.10-1 compat-libstdc++-33.x86_64 0:3.2.3-69.el6 ksh.x86_64 0:20120801-10.el6 libaio-devel.x86_64 0:0.3.107-10.el6 Complete! |
Checking if it has created the oracle user and the basic groups dba and oinstall
# id oracle uid=54321(oracle) gid=54321(oinstall) groups=54321(oinstall),54322(dba) |
Additional users and groups (Optional)
| # groupadd -g 54323 oper # groupadd -g 54324 backupdba # groupadd -g 54325 asmdba # groupadd -g 54326 dgdba # groupadd -g 54327 kmdba # groupadd -g 54328 asmadmin # groupadd -g 54329 asmoper # usermod -G oinstall,dba,vboxsf,asmdba,asmoper oracle |
The grid user will be the software owner for the Grid Infrastructure
| # useradd -u 54322 -g oinstall -G vboxsf,asmadmin grid |
The vboxsf group we see above is to allow both OS users to have access to the VirtualBox shared folders.
Directories
| # mkdir -p /u01/app/12.1.0/grid # mkdir -p /u01/app/grid # mkdir -p /u01/app/oracle# chown -R grid:oinstall /u01 # chown oracle:oinstall /u01/app/oracle # chmod -R 775 /u01/ |
So, if I am right, the grid user is the owner of the Grid Infrastructure software. It will be able to connect to the ASM instance AS SYSASM.
The oracle user will own the Oracle Database Software and will be allowed to access the ASM data thanks to the its asmdba group membership.
The oracle user won't be able to manage the cluster nor connect to the ASM instance AS SYSASM.
ASMLIB or ASMFD? I am confused (Ma vai racha uma lenha!)
For the sake of simplicity, I will be using ASMLIB for this installation.
More information on how to decide between them here.
Download the ASMLIB from here. Note that Oracle Linux 6 ships with the ASMLIB kernel drivers. I am using yum to install the oracleasm-support package as the package is available on the DVD image we built our repository on.
| # yum install oracleasm-support.x86_64 Loaded plugins: refresh-packagekit, security Setting up Install Process Resolving Dependencies --> Running transaction check ---> Package oracleasm-support.x86_64 0:2.1.8-1.el6 will be installed --> Finished Dependency Resolution Dependencies Resolved ... ... Running Transaction Installing : oracleasm-support-2.1.8-1.el6.x86_64 1/1 Verifying : oracleasm-support-2.1.8-1.el6.x86_64 1/1 Installed: oracleasm-support.x86_64 0:2.1.8-1.el6 Complete! |
Since the oracleasm kernel driver is built into the Unbreakable Enterprise Kernel for Oracle Linux 6 we do not need to install it manually.
| # oracleasm init Creating /dev/oracleasm mount point: /dev/oracleasm Loading module "oracleasm": oracleasm Configuring "oracleasm" to use device physical block size Mounting ASMlib driver filesystem: /dev/oracleasm
# oracleasm status Checking if ASM is loaded: yes Checking if /dev/oracleasm is mounted: yes
# /etc/init.d/oracleasm configure Configuring the Oracle ASM library driver. This will configure the on-boot properties of the Oracle ASM library driver. The following questions will determine whether the driver is loaded on boot and what permissions it will have. The current values will be shown in brackets ('[]'). Hitting <ENTER> without typing an answer will keep that current value. Ctrl-C will abort. Default user to own the driver interface []: grid Default group to own the driver interface []: oinstall Start Oracle ASM library driver on boot (y/n) [n]: y Scan for Oracle ASM disks on boot (y/n) [y]: y Writing Oracle ASM library driver configuration: done Initializing the Oracle ASMLib driver: [ OK ] Scanning the system for Oracle ASMLib disks: [ OK ] |
Stamping our devices as ASM disks
Now, should I or should't partition our /dev/sd* devices which will be ASM disks?
There is a great post from Tim Hall where he explains just that and much more here. So, we have the following devices to stamp:
| brw-rw----. 1 root disk 8, 16 Nov 25 18:18 /dev/sdb brw-rw----. 1 root disk 8, 32 Nov 25 18:18 /dev/sdc |
First Device | # fdisk /dev/sdb WARNING: DOS-compatible mode is deprecated. It's strongly recommended to switch off the mode (command 'c') and change display units to sectors (command 'u'). Command (m for help): n Command action e extended p primary partition (1-4) p Partition number (1-4): 1 First cylinder (1-1044, default 1): Using default value 1 Last cylinder, +cylinders or +size{K,M,G} (1-1044, default 1044): Using default value 1044 Command (m for help): w The partition table has been altered! Calling ioctl() to re-read partition table. Syncing disks. |
Second Device
| # fdisk /dev/sdc WARNING: DOS-compatible mode is deprecated. It's strongly recommended to switch off the mode (command 'c') and change display units to sectors (command 'u'). Command (m for help): n Command action e extended p primary partition (1-4) p Partition number (1-4): 1 First cylinder (1-1044, default 1): Using default value 1 Last cylinder, +cylinders or +size{K,M,G} (1-1044, default 1044): Using default value 1044 Command (m for help): w The partition table has been altered! Calling ioctl() to re-read partition table. Syncing disks. |
 Watch Out Watch Out |
| Please note that if you are deriving these devices from a storage LUN, you may need to pay special attention to the partition alignment! This is out of the scope of this post. |
| # oracleasm createdisk DATA1 /dev/sdb1 Writing disk header: done Instantiating disk: done
# oracleasm createdisk FRA1 /dev/sdc1 Writing disk header: done Instantiating disk: done |
Check if everything went fine:
| # oracleasm listdisks DATA1 FRA1 # oracleasm querydisk -p DATA1 Disk "DATA1" is a valid ASM disk /dev/sdb1: LABEL="DATA1" TYPE="oracleasm" # oracleasm querydisk -p FRA1 Disk "FRA1" is a valid ASM disk /dev/sdc1: LABEL="FRA1" TYPE="oracleasm" |
Finally, we have a cosy bed for our cluster and database files. Perhaps some OS files too when we play around with ACFS.
Installation
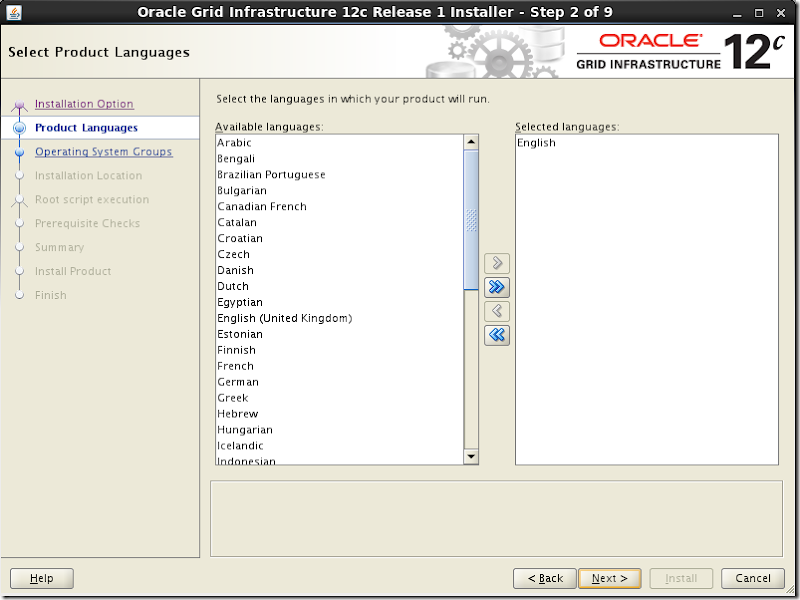
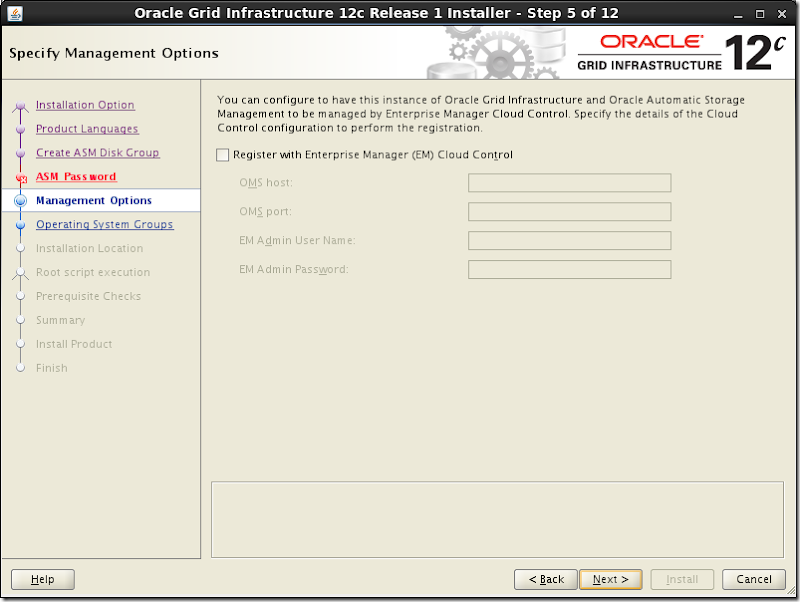
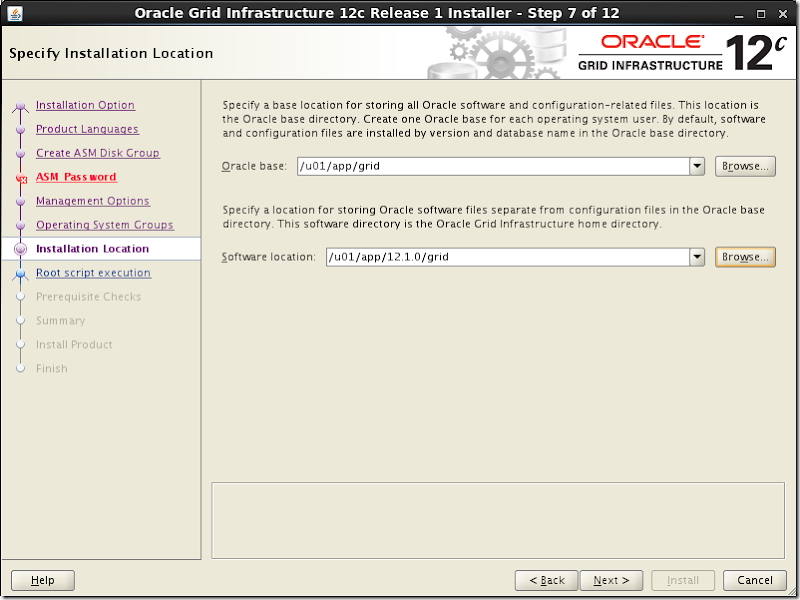
Once everything has been set-up, it is time to run the famous ./runInstaller.sh.
| # xhost + # su - grid mkdir /u01/app/software chmod 777 /u01/app/software |
Copy the compressed files from the VirtualBox shared folder to directory created above:
| $ cp -v linuxamd64_12102_grid_1of2.zip linuxamd64_12102_grid_2of2.zip /u01/app/software/ `linuxamd64_12102_grid_1of2.zip' -> `/u01/app/software/linuxamd64_12102_grid_1of2.zip' `linuxamd64_12102_grid_2of2.zip' -> `/u01/app/software/linuxamd64_12102_grid_2of2.zip' $ cd /u01/app/software $ unzip linuxamd64_12102_grid_1of2.zip $ unzip linuxamd64_12102_grid_2of2.zip $ cd grid $ ./runInstaller.sh |

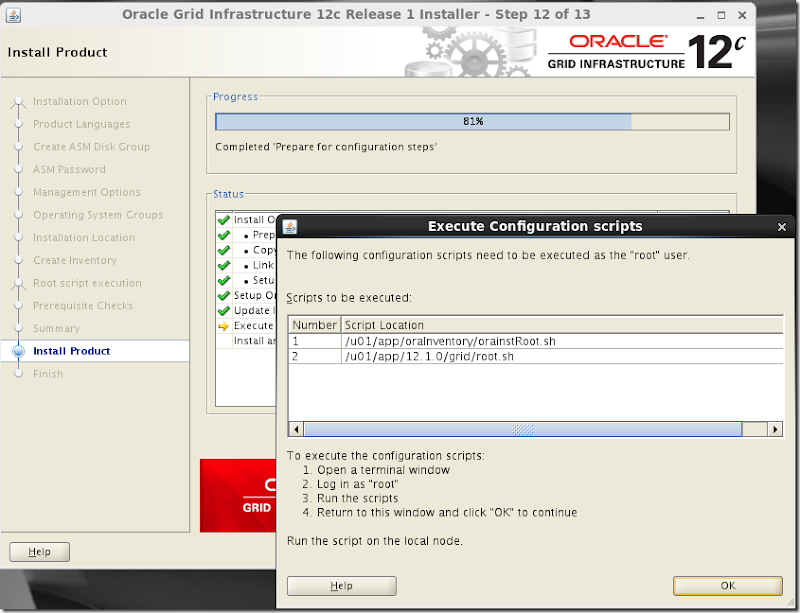
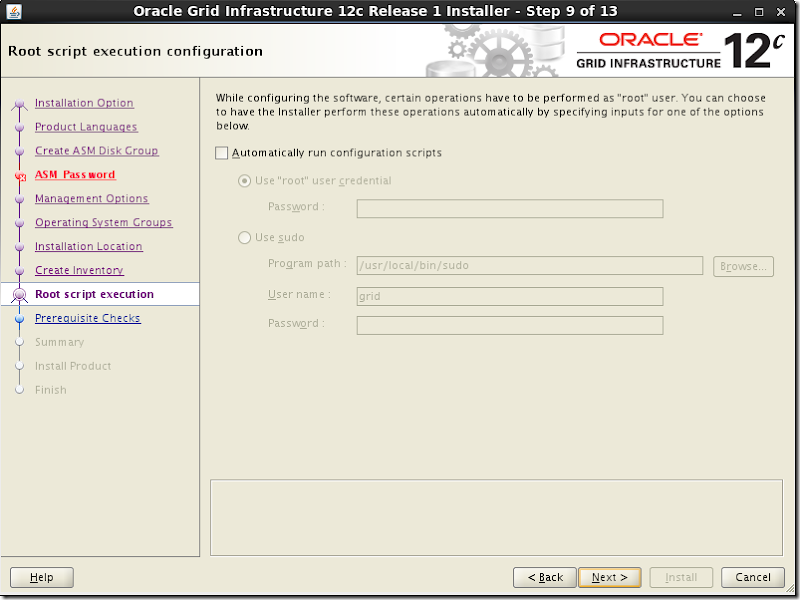
Running the scripts
|
# /u01/app/oraInventory/orainstRoot.sh
Changing permissions of /u01/app/oraInventory.
Adding read,write permissions for group.
Removing read,write,execute permissions for world.
Changing groupname of /u01/app/oraInventory to oinstall.
The execution of the script is complete.
[root@ocmdb12c ~]# /u01/app/12.1.0/grid/root.sh
Performing root user operation.
The following environment variables are set as:
ORACLE_OWNER= grid
ORACLE_HOME= /u01/app/12.1.0/grid
Enter the full pathname of the local bin directory: [/usr/local/bin]:
Copying dbhome to /usr/local/bin ...
Copying oraenv to /usr/local/bin ...
Copying coraenv to /usr/local/bin ...
Creating /etc/oratab file...
Entries will be added to the /etc/oratab file as needed by
Database Configuration Assistant when a database is created
Finished running generic part of root script.
Now product-specific root actions will be performed.
Using configuration parameter file: /u01/app/12.1.0/grid/crs/install/crsconfig_params
LOCAL ADD MODE
Creating OCR keys for user 'grid', privgrp 'oinstall'..
Operation successful.
LOCAL ONLY MODE
Successfully accumulated necessary OCR keys.
Creating OCR keys for user 'root', privgrp 'root'..
Operation successful.
CRS-4664: Node ocmdb12c successfully pinned.
2015/11/26 00:50:39 CLSRSC-330: Adding Clusterware entries to file 'oracle-ohasd.conf'
ocmdb12c 2015/11/26 00:50:56 /u01/app/12.1.0/grid/cdata/ocmdb12c/backup_20151126_005056.olr 0
CRS-2791: Starting shutdown of Oracle High Availability Services-managed resources on 'ocmdb12c'
CRS-2673: Attempting to stop 'ora.evmd' on 'ocmdb12c'
CRS-2677: Stop of 'ora.evmd' on 'ocmdb12c' succeeded
CRS-2793: Shutdown of Oracle High Availability Services-managed resources on 'ocmdb12c' has completed
CRS-4133: Oracle High Availability Services has been stopped.
CRS-4123: Oracle High Availability Services has been started.
2015/11/26 00:52:07 CLSRSC-327: Successfully configured Oracle Restart for a standalone server
|
Oh! Man, this one took longer than I anticipated…
I quick check at both Oracle Restart and ASM:
$ crsctl check has
CRS-4638: Oracle High Availability Services is online
$ asmcmd
ASMCMD> lsdg
State Type Rebal Sector Block AU Total_MB Free_MB Req_mir_free_MB Usable_file_MB Offline_disks Voting_files Name
MOUNTED EXTERN N 512 4096 1048576 8189 8127 0 8127 0 N DATA/ |
We can see the only one disk group has been setup. We will now finish the ASM configuration by adding another disk group.
To do that, we will use ASMCA
$ . oraenv
ORACLE_SID = [grid] ? +ASM
The Oracle base has been set to /u01/app/grid
$ asmca |

We want to create a new ASM Disk Group by clicking on the Create Push-Button.

Click OK
ASMCA happens to be the fastest way to configure ASM ADVM volumes and ACFS

If the Volumes and ASM Cluster File Systems tab are disabled, it means that the required kernel modules are not loaded.
You can load the modules manually with the following command:
| /u01/app/12.1.0/grid/bin start -s |
For more information on setting up ACFS, check this out.
To find this in the Oracle Documentation, follow these path:
![clip_image002[8] clip_image002[8]](http://lh3.googleusercontent.com/-31I2YSWsBu0/Vlc_69YSadI/AAAAAAAAAdU/maXO2AjH_yk/clip_image002%25255B8%25255D_thumb.gif?imgmax=800) How to Get to It in the Documentation? How to Get to It in the Documentation? |
| Oracle Database Online Documentation 12c Release 1 (12.1) / Clustering / Automatic Storage Management Administrator's Guide / <CTRL>+F, type in “acfsload” and <ENTER> |
This is it for this post as we have accomplished what the Post Title says.
The next step will be to install the Oracle Database Software and then create an instance and database. This will cover the topic
Install the Oracle Database 12c software and, perhaps create and manage pluggable databases.
Até la!
Daniel
Check out other posts of this Series:

